To make a custom vinyl figure for a commercial release, you need more than a finished illustration. The design must become a buildable 3D model, a physical shape prototype, production tooling and molded parts. Color, assembly and the packaged product then need their own checks before bulk production is released.
For brand and IP teams asking how to make a custom vinyl figure, the useful question at each stage is simple: what are we approving, and what has this sample actually proved? A good-looking render cannot answer the same questions as a molded sample. This guide follows a hollow vinyl development route; the factory must confirm the material and molding method for your particular design.
In This Guide
- Start with production artwork for custom vinyl figures
- Turn the artwork into a buildable 3D model
- Approve a physical prototype before production tooling
- Make custom vinyl toys with an agreed molding route
- Paint and assemble custom vinyl figures against approved references
- Release bulk production after the right checks
- How to Make a Custom Vinyl Figure: Common Questions
- Keep every approval tied to a clear decision
- Discuss your custom vinyl figure project with WEIMEI TOYS
Start with production artwork for custom vinyl figures
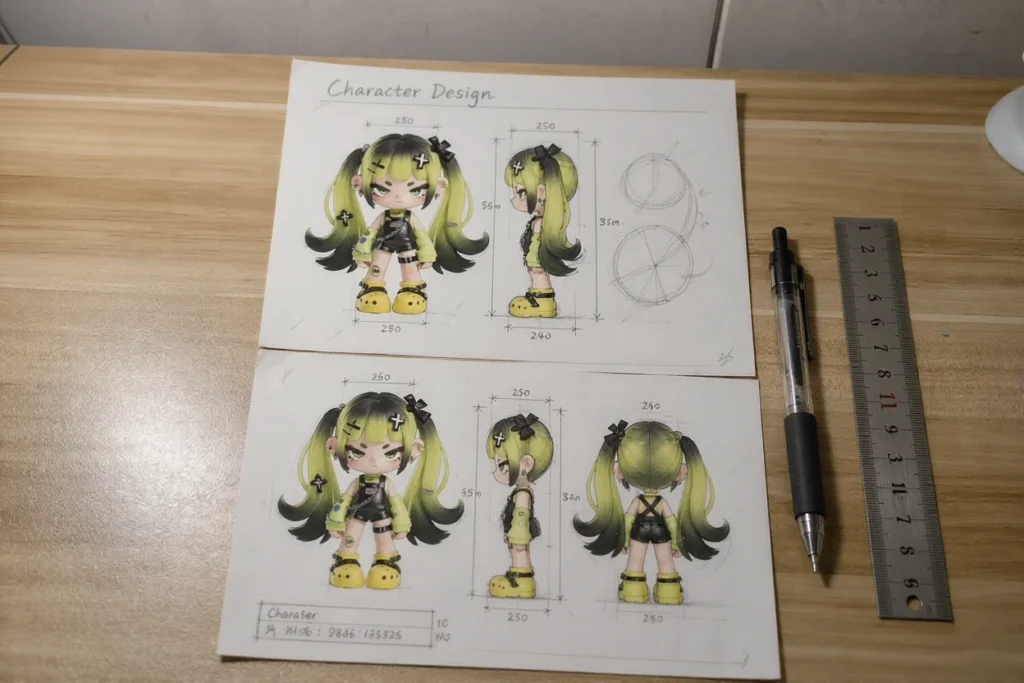
Start with the character’s front, side and rear views at a consistent scale. Mark the overall height, say whether that includes the base, and identify any separate accessories. If the drawing uses perspective or intentionally exaggerated proportions, flag the features that must survive the move into three dimensions.
Define the identity of your custom vinyl figurine
An eye line that works in a front illustration can look angry when wrapped around a curved face. Rather than asking for the same feeling, mark the eye angle, mouth position and silhouette you want protected. When the front and side views disagree, settle the intended shape before modeling begins.
The brief should also state the intended audience, display or play use, destination market, quantity by colorway and required arrival date. Include the artwork you are authorized to use and nominate one person to consolidate approvals. These details give the factory a basis for reviewing feasibility instead of guessing from a single image.
Turn the artwork into a buildable 3D model
Review the model from several angles, including the back and underside. Check the head-to-body proportion, the space between limbs and the contact area under the feet. Ask for a clear explanation of how the figure will stand and which surfaces will remain visible after assembly.
What a custom vinyl figure manufacturer needs to review
The manufacturing review should address part separation, mold access, demolding, joints and any features that may need redesign. A narrow hook, deep recess or heavy accessory may change the proposed construction. Ask the factory to show the planned openings and joins on the model, and explain any visible change before you approve it.
Keep feedback in one marked-up version: move this eye, shorten this projection, retain this curve. When several people send separate comments against different files, it becomes difficult to know which design has actually been approved. Freeze the agreed model revision before the next sample is made.
Approve a physical prototype before production tooling
A physical prototype lets you judge size, balance and the character’s expression in your hand. View it at normal display distance, then inspect close-up details. Photographs from one flattering angle can hide a shallow face, an awkward back profile or a base that looks too large beside the figure.
Keep shape approval separate from color approval
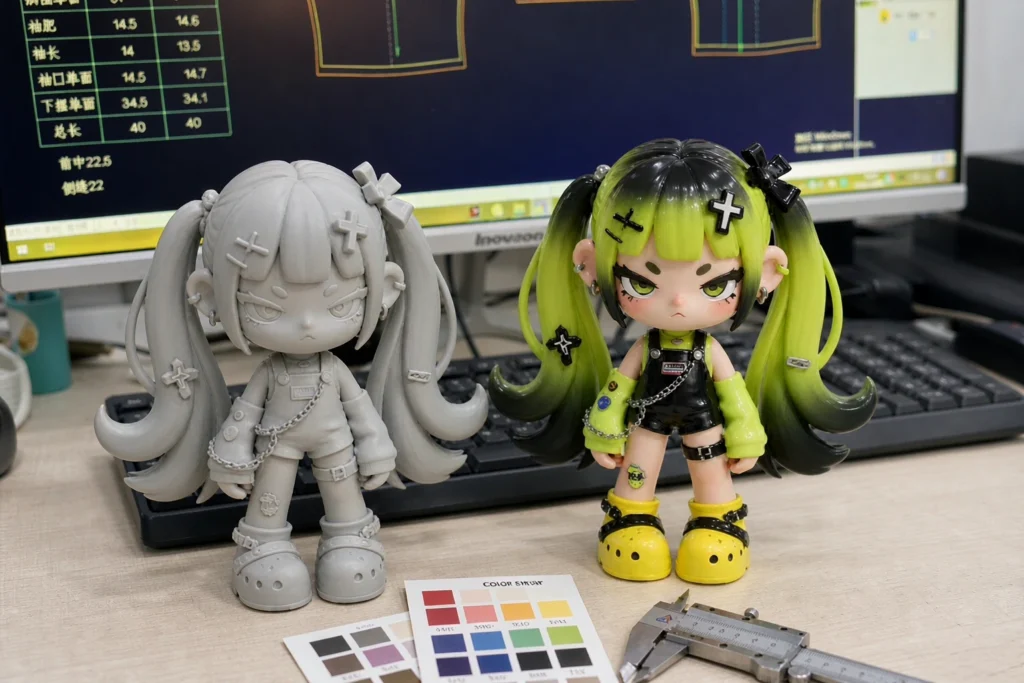
Ask what the prototype is made from. A resin or 3D-printed shape sample can support a geometry review, but it does not establish the final vinyl’s flexibility, weight, surface feel or assembly fit. Record the limitations beside the approval so shape approved is not later treated as production approved.
Agree which corrections must be closed before tooling starts. If a paint reference is prepared at this stage, keep its role explicit: it communicates color placement and finish. It is not evidence that the molded production parts will already match that appearance.
Make custom vinyl toys with an agreed molding route
The term vinyl does not specify one universal production method. For example, in slush casting, liquid plastisol forms a layer against a heated mold; excess liquid is drained, and the remaining material is cured and cooled before removal. Piper Plastics describes this process in its plastisol casting overview [1]. Ask which route is proposed for your figure rather than assuming every PVC toy is made this way.
Before authorizing tooling, record the approved model, part list, material proposal and finish requirements. Also agree how tooling changes will be reviewed, who owns the tools and what is included in the development scope. A verbal ready to make leaves too much room for different interpretations.
Review the first custom vinyl toy parts
Examine actual molded parts for silhouette, surface detail, distortion and consistency of feel. Assemble them to check joint gaps, accessory fit and standing stability. If something differs from the prototype, identify whether the cause is geometry, tooling, material or assembly before choosing a correction. Repainting cannot resolve a poor mechanical fit.
Paint and assemble custom vinyl figures against approved references
Provide a color map that separates the molded base color from painted or printed areas. Name the color reference system and version being used, and describe matte, satin or gloss finishes by area. A screen image alone leaves room for differences in both color and sheen.
Check facial details and final fit on custom vinyl toys
Review a physical decorated sample under agreed lighting. Check eye alignment, the edges of painted areas, small marks and the relationship between colors. For a character with a simple face, a small shift in one eye can matter more than a large color area on its back. Mark acceptable boundaries instead of requesting a vague better finish.
Then review the assembled sample. Check that decorated parts still fit as intended, that accessories stay in their specified position and that handling does not reveal an obvious rubbing problem. Document the agreed appearance and assembly checks with the sample revision they belong to.
Release bulk production after the right checks
Request a pre-production sample made with the proposed production materials, decoration and packaging. Check the pack’s support points and whether the figure or accessories can move against a painted surface. The approved file set should include the product specification, artwork revisions, packaging files and agreed inspection criteria.
Confirm the release with your custom vinyl figure manufacturer
Agree the applicable safety and testing scope for the intended age group, use and sales market before production release. For U.S. projects, consult CPSC toy safety guidance [2] and confirm product-specific requirements with a qualified laboratory. An appearance approval or a collectible label does not by itself establish the applicable requirements.
Build the schedule around approval milestones as well as factory work: model review, physical sample, tooling, molded parts, decoration, pre-production approval and shipment. If a launch date is fixed, ask where revision time is allowed. For the commercial side, use our guide on how to compare custom plastic figure quotes to check that competing proposals cover the same deliverables.
How to Make a Custom Vinyl Figure: Common Questions
Can I start without a 3D file?
Yes. Begin with clear artwork, reference views, dimensions and a written brief. Confirm whether 3D modeling is included in the supplier’s development scope, which file formats will be delivered and how revisions will be handled.
Is a 3D-printed sample the final vinyl sample?
No. It may be useful for shape review, but its material and construction can differ from production. Approve the actual molded and decorated sample separately for the characteristics the printed model cannot demonstrate.
Does every colorway need a new mold?
A color change may allow the same tooling to be used if geometry and construction remain unchanged. A new sculpt, joint or molded surface detail may need tooling changes. Have the factory confirm what is shared before budgeting a series.
How long does development take?
There is no reliable single duration without reviewing the design and approval scope. Request a stage-by-stage plan that separates development, revisions, tooling, production, testing and transport. State your arrival deadline rather than only asking for a production completion date.
Are vinyl figures always soft and hollow?
No. Product terminology is used broadly. This article focuses on a hollow vinyl route; the proposed formulation, construction and molding method determine the actual product. Ask for the material specification and a representative physical sample.
Keep every approval tied to a clear decision
A workable development plan gives each approval a clear purpose. Settle the character and construction before tooling, review actual molded parts before accepting their production behavior, and check the decorated, packaged sample before release. Keep one current specification and a written record of unresolved points. That makes the next decision far clearer than another unqualified sample approved.
Discuss your custom vinyl figure project with WEIMEI TOYS
Preparing a custom vinyl figure project? Send WEIMEI TOYS your authorized artwork, target height, quantity by colorway, intended audience, destination market and required arrival date. Include any shape or finish details you cannot compromise on so the initial discussion can focus on a realistic development scope.
References
- [1] Piper Plastics Corp., Plastisol Casting. Source for the short slush-casting explanation. Accessed October 31, 2026.
- [2] U.S. Consumer Product Safety Commission, Toy Safety Business Guidance. Consult current requirements for the specific product and destination. Accessed October 31, 2026.